

Press-On Nail Guides & Inspiration
Oval Press-On Nails: A Soft Shape for Everyday Wear
Short answer: Oval press-on nails have softly rounded sides and a curved tip, creating a natural-looking shape without a sharp corner. They suit everyday wear when the base fits sidewall to sidewall and the length remains comfortable for your routine.
In this guide
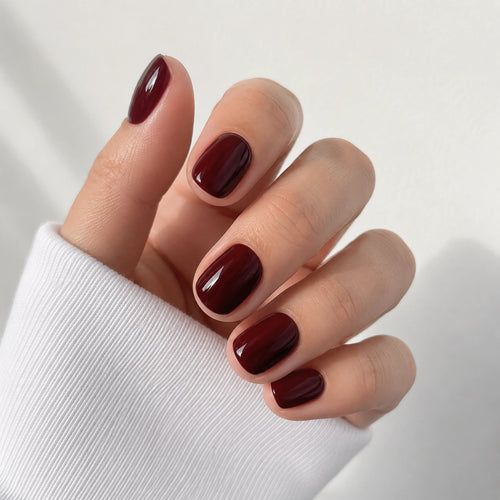
Oval press-on nails give the manicure a rounded outline, but the shape does not dictate a quiet design. Floral layers, rich burgundy or a red bow can all sit within that softer silhouette. Choose the outline for the look you like, then let the details set the mood.
A rounded outline can still make a statement
Petal Chandelier pairs the oval outline with light layered flowers. Garnet Wish uses deeper colour and gold starbursts for more contrast.
 Petal ChandelierLayered pink-and-white flowers give the rounded shape a soft, decorative occasion feel.Shop Petal Chandelier
 Garnet WishBurgundy, blush and gold starbursts add contrast without a sharply pointed silhouette.Shop Garnet Wish
 Red RuffleRed bows, polka dots and French-style colour blocking bring a playful note to the oval outline.Shop Red Ruffle
Outline, length and decoration
| Factor | What to look for |
|---|---|
| Silhouette | The rounded tip feels softer than square and less tapered than almond. |
| Length | Short and medium oval shapes keep the curve visible without extreme leverage. |
| Finger effect | Oval can make the nail look gently elongated while remaining understated. |
| Fit | The soft tip does not change the need for accurate base width and curve. |
Choose your oval design
- Look at the tip outline in the product photo: oval should read as a rounded end rather than a sharp point or flat square edge.
- Choose between a quieter surface and detailed artwork. Garnet Wish adds stars, bows and gems; Red Ruffle brings a more graphic red-and-white mix.
- Check the listed length and sizing separately from the oval label. A rounded outline alone does not tell you how much the nail will extend beyond your fingertip.
Picture the oval shape in your routine
Red Ruffle adds a playful red-and-white pattern while keeping the overall silhouette rounded. Compare the full set images, and check each product’s length and size format: oval describes the outer shape, not the width of the piece or a universal fit.
For the core process, keep the Size & Fit Guide and Application & Removal Guide nearby. You can also review how to apply press-on nails, adhesive tabs vs nail glue, and gentle removal.
Oval-shape assumptions to avoid
- Choosing oval press-on nails by tip shape while ignoring the width and curve at the base.
- Using a narrow piece that leaves both sidewalls exposed because it looks tidy from a distance.
- Forcing a poor curve match down with pressure or extra adhesive.
Browse the Oval edit for the balance of shape, colour and decoration you want. Explore the styles.
FAQ
How do I check oval press-on nails before using adhesive?
Start with silhouette: The rounded tip feels softer than square and less tapered than almond. Test every piece without adhesive and view it from both the front and side.
Should I choose the larger press-on size?
If the smaller size leaves a side gap and the next size is only slightly wide, choose the wider piece and file both sides gradually.
Can I file the sides of a press-on nail?
Yes. File small amounts before application, keep the sides balanced, and test repeatedly so the nail still follows the natural sidewalls.
Which press-on nail length is easiest for daily wear?
Short is usually the easiest starting point. Medium adds more visible shape, while long shapes require more adjustment and create more leverage.